

Kit (formerly ConvertKit) is an email marketing platform designed specifically for creators — bloggers, podcasters, YouTubers, course creators, authors, and online entrepreneurs who want to grow and monetise their audience. Unlike platforms built for traditional businesses, Kit prioritises simplicity, deliverability, and creator-focused features like digital product sales and paid newsletters.
Singapore’s creator economy continues to grow rapidly in 2026, with more individuals building sustainable businesses around content creation, coaching, digital products, and online education. Kit provides the tools these creators need to build an email list, nurture their audience, and generate revenue — all without needing technical expertise or a large team.
This ConvertKit tutorial covers subscriber management, tags and segments, visual automation builders, landing page creation, broadcast emails, and commerce features for selling digital products. Whether you are just starting your creator journey or looking to scale an existing audience, this guide gives you the practical knowledge to make Kit work for your goals.
Getting Started with ConvertKit
Sign up for Kit at kit.com. The free plan supports up to 10,000 subscribers with basic features, making it an excellent starting point for new creators. During registration, provide your name, email address, and details about your creator business. Kit’s onboarding asks about your audience size and goals to tailor the initial setup experience.
Configure your account settings by clicking the gear icon in the top navigation. Set your timezone to Singapore Standard Time (GMT+8), enter your business address for email footer compliance, and upload a profile photo that represents your personal brand. If you create content under a brand name, use that as your sender name for consistency.
Verify your sending domain to improve email deliverability. Navigate to Email Settings and follow the instructions to add DNS records to your domain. This authentication process tells email providers that Kit is authorised to send on your behalf, significantly reducing the chance of your emails being marked as spam.
Connect Kit to your existing platforms. Integrations are available for WordPress, Teachable, Squarespace, Gumroad, Patreon, Zapier, and many other tools popular with creators. These connections enable automatic subscriber syncing, purchase tracking, and cross-platform automation. If you have an existing email list on another platform, use Kit’s import feature to migrate your subscribers seamlessly.
Familiarise yourself with Kit’s dashboard, which provides an overview of your subscriber count, growth trends, and recent activity. The navigation is straightforward — Subscribers, Automations, Landing Pages, Broadcasts, and Earn are the main sections you will use regularly. This clean interface reflects Kit’s philosophy of keeping things simple so creators can focus on content rather than complex marketing tools. A solid email setup complements your broader content marketing strategy.
Managing Subscribers Effectively
Kit uses a subscriber-centric model rather than a list-based model. Every contact exists once in your account, regardless of how many forms or landing pages they subscribed through. This eliminates duplicate contacts and gives you a unified view of each subscriber’s journey.
Add subscribers manually by clicking “Add Subscribers” in the Subscribers section. You can add individual contacts or import a CSV file. When importing, map your file columns to Kit fields including email address, first name, and any custom fields you have created. Kit confirms imports and flags any invalid email addresses.
View individual subscriber profiles by clicking on any contact. The profile page shows their subscription date, tags applied, forms and landing pages they subscribed through, emails they have received, opens, clicks, and any purchases made through Kit Commerce. This comprehensive view helps you understand each subscriber’s engagement level and interests.
Manage subscriber statuses to maintain a healthy list. Kit categorises contacts as active, unconfirmed, cancelled, or complained. Regularly review your unconfirmed subscribers — these are contacts who started the double opt-in process but did not click the confirmation link. Consider resending the confirmation email or removing stale unconfirmed contacts after 30 days.
Create custom fields to capture additional subscriber information. Navigate to Subscribers, then Custom Fields, and add fields relevant to your creator business. Useful fields include content preferences, experience level, location, or how they discovered you. Use these fields in forms and surveys to collect the data, then leverage it for personalisation and segmentation in your emails and automations.
Using Tags and Segments
Tags are the backbone of Kit’s organisation system. They are simple labels you apply to subscribers to categorise them based on interests, behaviour, purchase history, or any other criteria. Unlike rigid list structures, tags provide flexible, overlapping categorisation that reflects how audiences actually engage with creator content.
Create tags by navigating to Subscribers, then Tags, and clicking “Create a Tag.” Use descriptive names that clearly indicate what the tag represents. A Singapore-based content creator might create tags like “Interested in Photography,” “Downloaded Free Guide,” “Attended Workshop,” “Purchased Course A,” and “VIP Subscriber.” Establish a naming convention early to keep your tagging system organised as it grows.
Apply tags automatically through forms, automations, and link triggers. When a subscriber signs up through a specific form, automatically apply a relevant tag. When they click a particular link in an email, apply a tag that records their interest. When they complete a purchase, tag them as a buyer. These automatic tagging mechanisms build rich subscriber profiles without manual effort.
Use link triggers to tag subscribers based on email engagement. In any broadcast or automation email, you can designate specific links as trigger links. When a subscriber clicks a trigger link, Kit automatically applies or removes a tag. This is powerful for preference surveys — send an email asking “What topic interests you most?” with multiple links, each applying a different interest tag.
Build segments by combining tags, custom fields, and engagement criteria. Navigate to Subscribers, then Segments, and create segments using AND/OR logic. For example, create a segment of subscribers who have the “Interested in Photography” tag AND have been active in the last 60 days AND have NOT purchased your photography course. This segment is a perfect target for a course launch campaign. Effective segmentation ensures your email marketing delivers the right message to the right audience at the right time.
Building Visual Automations
Kit’s visual automation builder lets you create sophisticated email sequences triggered by subscriber actions. Navigate to Automations and click “Create Automation” to open the visual builder. The canvas-based interface makes it easy to design complex workflows by connecting triggers, actions, events, and conditions.
Start every automation with an entry point. Options include joining a form, receiving a tag, completing a purchase, or entering a custom field value. For a welcome sequence, choose “Joins a Form” and select your main signup form. For a product launch sequence, choose “Tag is Added” and select the tag that identifies interested subscribers.
Add email steps to your automation by clicking the plus icon and selecting “Email.” Write your email directly in the automation builder using Kit’s clean text editor. Kit deliberately avoids heavy HTML email designs in favour of plain-text-style emails that feel personal and achieve higher engagement rates. This approach aligns with creator-audience relationships that are built on authenticity rather than corporate polish.
Insert wait steps between emails to control timing. Choose specific durations (wait 2 days) or wait until a specific day and time (wait until Monday at 10am SGT). Strategic timing keeps subscribers engaged without overwhelming them. For a typical welcome sequence, space emails two to three days apart to maintain momentum while giving subscribers time to consume each piece of content.
Add conditions to create branching paths. After sending a pitch email for a product, add a condition that checks whether the subscriber purchased. If yes, route them to a thank-you sequence and remove the sales tag. If no, continue with additional persuasion emails. Conditions can check for tags, custom field values, product purchases, and email engagement. This branching logic ensures every subscriber receives a relevant experience, which supports your broader digital marketing efforts.
Create these essential automations: a welcome sequence that introduces new subscribers to your best content over five to seven emails, a lead magnet delivery sequence that sends the promised resource and follows up with related content, and a product launch sequence that builds anticipation, presents the offer, and handles objections over a seven to ten day period.
Creating Landing Pages and Forms
Kit offers built-in landing pages and signup forms that help you grow your subscriber list without needing a separate website. Navigate to Landing Pages & Forms to access the builder. Choose between landing pages (standalone pages with their own URL) and forms (embeddable elements for your existing website).
Create a landing page by clicking “Create New” and selecting “Landing Page.” Browse Kit’s template gallery and choose a design that matches your brand aesthetic. Templates cover common use cases including newsletter signups, lead magnet downloads, webinar registrations, and waitlists. Each template is fully customisable.
Customise your landing page using the visual editor. Edit text, swap images, change colours, adjust fonts, and modify the layout to match your brand. Write a compelling headline that clearly communicates the value of subscribing. Add bullet points listing what subscribers will receive. Include a strong call-to-action button with specific text like “Send Me the Free Guide” rather than generic text like “Submit.”
For Singapore creators, include locally relevant social proof on your landing pages. Mention your Singapore-based audience, reference local events or media appearances, and use testimonials from Singaporean subscribers. These trust signals resonate with local audiences and differentiate you from international creators. Optimise your landing page text with keywords relevant to your niche to improve discoverability through SEO.
Create embedded forms for your website by selecting “Form” instead of “Landing Page.” Choose from inline forms, modal pop-ups, slide-in forms, and sticky bars. Configure display rules to control when and where forms appear — show them after a time delay, on scroll percentage, or on exit intent. Set form-specific tags so you know which form each subscriber used, enabling targeted follow-up sequences.
Connect forms and landing pages to automation sequences. In the form settings, select “Add to an Automation” and choose the relevant welcome sequence or lead magnet delivery automation. This creates a seamless experience from signup to first email without any manual intervention.
Sending Broadcast Emails
Broadcasts are one-time emails sent to your subscriber list or a specific segment. Use broadcasts for newsletters, announcements, promotions, content updates, and any communication that is not part of an automated sequence. Navigate to Broadcasts and click “Create” to start.
Select your recipients by choosing from your full subscriber list, specific tags, or custom segments. Use exclusion filters to remove subscribers who should not receive this particular message — for example, exclude people who already purchased the product you are promoting, or exclude subscribers in an active automation sequence that covers similar content.
Write your broadcast using Kit’s content editor. The editor emphasises clean, readable text with minimal formatting options by design. You can add headings, bold text, links, images, and buttons. Kit’s philosophy is that simple, text-focused emails perform better than heavily designed HTML emails — and the data consistently supports this approach, with plain-text-style emails achieving higher click-through rates across most creator niches.
Use personalisation to make broadcasts feel individual. Insert the subscriber’s first name using merge tags, reference their specific interests based on tag data, and write in a conversational tone that mirrors one-to-one communication. For Singapore creators writing to a local audience, incorporate local references, Singlish phrases (where appropriate for your brand), or mentions of Singapore-specific events and contexts.
Schedule your broadcast for optimal engagement. Choose to send immediately or schedule for a specific date and time. Based on engagement patterns for Singapore audiences, weekday mornings between 8am and 10am SGT and evenings between 7pm and 9pm SGT tend to perform well. Test different send times with your specific audience and review open rate data to find your optimal window.
After sending, review broadcast analytics including open rate, click rate, unsubscribes, and individual link performance. Compare these metrics across broadcasts to identify which topics, formats, and send times resonate most with your audience. Use these insights to refine your content strategy and continuously improve engagement.
Selling with ConvertKit Commerce
Kit Commerce enables creators to sell digital products and subscriptions directly through the platform. This eliminates the need for separate e-commerce tools like Gumroad or Payhip, keeping your tech stack simple and your customer data unified. Navigate to the Earn section to access commerce features.
Create a digital product by clicking “New Product.” Kit supports digital downloads (ebooks, templates, presets, music, software), online courses, coaching packages, and memberships. Set your product name, description, price, and upload the deliverable files. Kit handles secure file delivery automatically upon purchase.
Set up pricing for your products. Choose between one-time payments and recurring subscriptions. For Singapore creators, check which currencies Kit Commerce currently supports — it offers a limited set of major currencies and processes payments through Stripe. Connect your Stripe account in the Kit settings to enable payment processing. Stripe handles card payments and currency conversion for overseas buyers.
Design your product sales page using Kit’s built-in page builder. Add product descriptions, feature lists, testimonials, images, and a purchase button. While simpler than dedicated e-commerce platforms, these sales pages provide everything most creators need to sell digital products effectively. Include Singapore-specific payment information to reassure local buyers about the transaction process.
Integrate commerce with your email automations for a powerful sales funnel. When a subscriber purchases a product, automatically apply a “Customer” tag, remove them from sales automation sequences, and enrol them in a post-purchase onboarding sequence. This integration between email and commerce creates a seamless customer experience from subscriber to buyer. Driving traffic to your commerce pages through social media marketing and paid advertising amplifies your sales potential.
Set up tip jars and paid newsletter subscriptions for recurring revenue. Kit’s tip jar feature lets supporters contribute voluntarily, while paid newsletters offer premium content to paying subscribers. These features suit Singapore creators building community-supported content businesses, providing predictable recurring income alongside one-time product sales.
Frequently Asked Questions
How much does ConvertKit cost for Singapore creators?
Kit offers a free plan for up to 10,000 subscribers with basic features including landing pages, forms, and broadcast emails. The paid Creator plan adds automation and third-party integrations, while the Creator Pro plan includes advanced features like subscriber scoring, advanced reporting, and priority support. Paid plans are priced in USD and scale with subscriber count, so check kit.com for current rates.
Can I migrate from another email platform to ConvertKit?
Yes, Kit offers migration assistance on paid plans (check current eligibility), or you can self-migrate by exporting subscribers from your current platform as a CSV file and importing them into Kit. Tags and custom fields can be mapped during import to preserve your subscriber organisation.
Is ConvertKit suitable for e-commerce businesses?
Kit is designed primarily for creators rather than traditional e-commerce businesses. If you sell physical products through Shopify or WooCommerce, platforms like Klaviyo or Mailchimp may be better suited. However, if you sell digital products, courses, memberships, or subscriptions, Kit’s commerce features integrate perfectly with its email marketing tools.
How does ConvertKit handle PDPA compliance for Singapore users?
Kit supports PDPA compliance through double opt-in confirmation, unsubscribe links in every email, and data export capabilities. Creators must ensure they collect explicit consent before adding subscribers, honour unsubscribe requests promptly, and protect personal data. Kit processes data under its terms of service, so review these to ensure alignment with your PDPA obligations.
What makes ConvertKit different from Mailchimp or Brevo?
Kit is purpose-built for individual creators and small teams, prioritising simplicity and email deliverability over feature breadth. Its subscriber-centric model, plain-text email approach, visual automation builder, and integrated commerce features cater specifically to creators who want to grow an audience and monetise through content and digital products. Mailchimp and Brevo target broader business audiences with more traditional marketing feature sets.
Can I use ConvertKit for a paid newsletter?
Yes, Kit supports paid newsletter subscriptions through its commerce features. Set up a recurring subscription product, create a subscriber tag for paying members, and use automation to deliver premium content exclusively to subscribers with that tag. This model is increasingly popular with Singapore creators who produce high-value niche content worth paying for.
Is ConvertKit now called Kit?
Yes, ConvertKit rebranded as Kit in 2024, and its website moved to kit.com. The core features, including subscribers, tags, segments, visual automations, landing pages, broadcasts and commerce, carried over under the new name, although some menu labels and plan names have changed. Tutorials and integrations that still mention ConvertKit generally apply to Kit, but the current interface may look slightly different from older screenshots and guides.
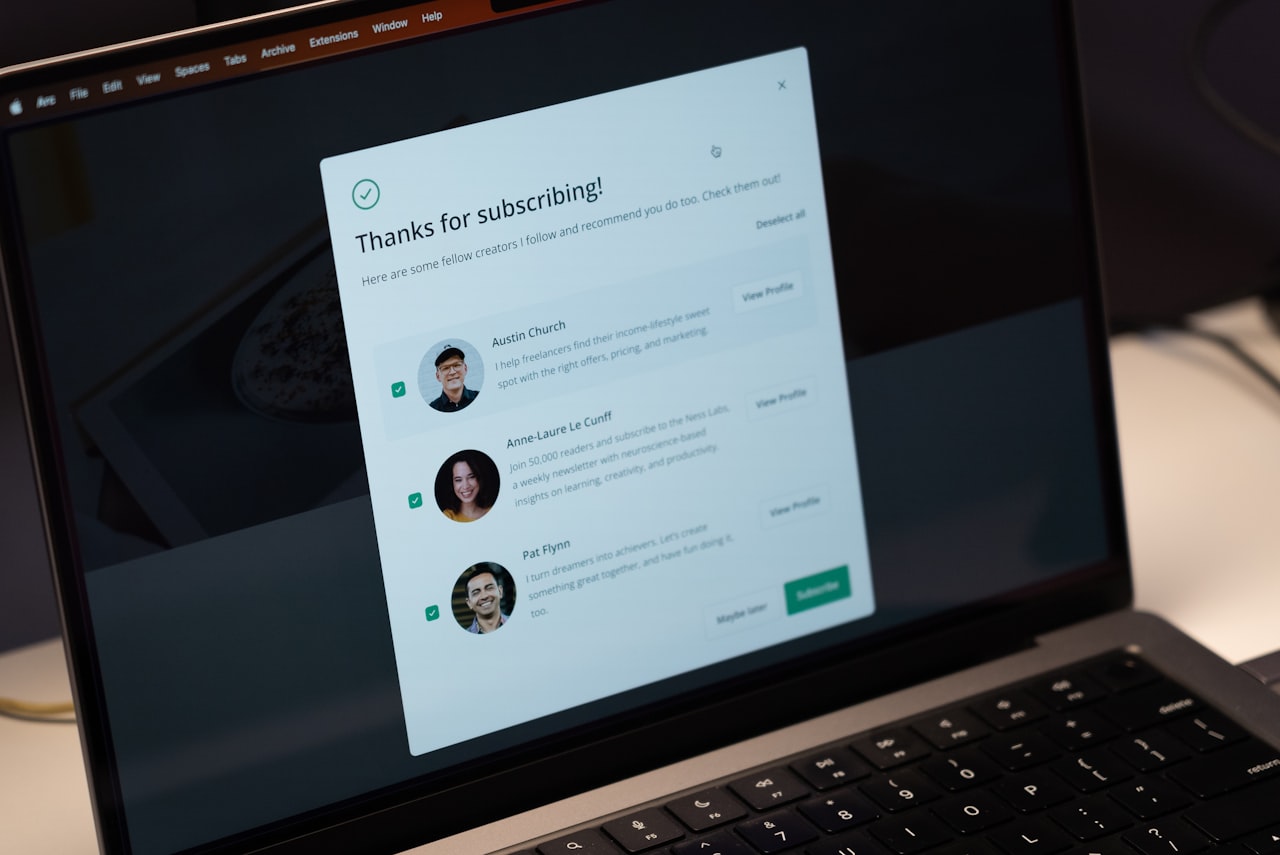
How can creators grow a ConvertKit (Kit) email list with Recommendations?
Kit’s Recommendations feature lets creators recommend each other’s newsletters at the point of sign-up, so new subscribers can opt in to several relevant newsletters in one step. Creators choose partners whose audiences overlap and can see how many subscribers each recommendation sends. It works best alongside a strong lead magnet, embedded forms and a welcome sequence, so subscribers arriving from partners engage quickly rather than going cold.
What email authentication does ConvertKit need for Gmail and Yahoo inbox delivery?
To meet Gmail and Yahoo sender requirements, ConvertKit (now Kit) users should authenticate their own sending domain with SPF and DKIM records and publish a DMARC record for that domain. Bulk senders must also offer one-click unsubscribe and keep spam complaint rates low, which built-in unsubscribe links help with. Sending from a free Gmail or Yahoo address is best avoided, because those domains’ DMARC policies can cause messages to be rejected.