Marketing Automation Workflows: Design Sequences That Convert
Anatomy of an Automation Workflow
Every marketing automation workflow, regardless of platform or purpose, consists of four building blocks: triggers, conditions, actions and timing. Understanding these components before you start building is the difference between workflows that convert and workflows that annoy.
A trigger is the event that enrols a contact into the workflow. It answers the question: “What happened to start this sequence?” A form submission, a page visit, a date reached, a score threshold crossed — each is a trigger that initiates automated action.
A condition evaluates whether something is true or false about the contact or their behaviour. Conditions create branches — pathways that deliver different experiences based on different circumstances. “Has the contact opened the previous email?” is a condition. “Is the contact’s industry financial services?” is a condition. Conditions make workflows intelligent rather than linear.
An action is what the workflow does — send an email, update a contact field, add a tag, notify a team member, move the contact to a different list, or trigger another workflow. Actions are the outputs that contacts experience or that change data in your system.
Timing controls when actions execute. Delays between actions prevent overwhelming contacts with rapid-fire messages. Wait conditions pause the workflow until a specific event occurs. Send windows ensure messages arrive during appropriate hours. In Singapore, this means respecting business hours for B2B communications and avoiding late-night sends for B2C.
The Workflow Lifecycle
A well-designed workflow has a clear beginning, a defined purpose and a specific exit point. Contacts enter through the trigger, progress through the sequence, and exit when they complete the desired action, meet an exit condition, or reach the end of the sequence. Every workflow should answer three questions: Who enters? What do they experience? How and when do they exit?
Triggers: Starting Your Workflows
The trigger you choose determines who enters your workflow and at what moment. Selecting the right trigger is crucial — an overly broad trigger floods your workflow with unqualified contacts, while an overly narrow trigger misses valuable opportunities.
Behavioural Triggers
Behavioural triggers fire based on what a contact does. These are the most powerful triggers because they respond to demonstrated intent. Common behavioural triggers include:
- Form submission: Contact fills out a specific form (enquiry, download, registration). The most reliable trigger because intent is explicit.
- Page visit: Contact views a specific page or set of pages. Pricing page visits are high-intent signals. Blog post visits indicate topic interest.
- Email engagement: Contact opens or clicks a specific email or link. Useful for branching within existing workflows or triggering new ones.
- Purchase or transaction: Contact completes a purchase. Triggers post-purchase and onboarding workflows.
- Content download: Contact downloads a whitepaper, template or guide. Indicates topic-specific interest for targeted follow-up.
Demographic and Data Triggers
These triggers fire based on contact attributes or data changes: a contact field is updated, a contact is added to a specific list, a contact’s lead score crosses a threshold, or a contact’s lifecycle stage changes. These are useful for workflows that respond to internal data changes rather than external actions.
Time-Based Triggers
Date-based triggers activate on specific dates or relative time periods: a contact’s subscription anniversary, 30 days since last purchase, the first Monday of each month, or a specific calendar date for seasonal campaigns. For Singapore businesses, calendar triggers tied to Chinese New Year, National Day and year-end festive periods are particularly valuable. Your email marketing campaigns can be timed perfectly with date-based triggers.
Trigger Best Practices
Always add enrolment criteria to filter who enters the workflow. A form submission trigger should include conditions like “contact has not already completed this workflow” and “contact has consented to marketing communications.” Use re-enrolment settings deliberately — most workflows should only allow a contact to enter once, but some (like event registration confirmations) may need re-enrolment.
Conditions and Branching Logic
Conditions transform linear email sequences into intelligent, personalised experiences. Without conditions, every contact receives identical messages regardless of their behaviour, attributes or stage. With conditions, you create workflows that adapt in real time.
If/Then Branches
The most common condition structure. “If the contact opened Email 1, then send Email 2A (deeper content). If not, then send Email 2B (re-engagement angle).” This single branch doubles the relevance of your workflow by addressing two distinct situations appropriately.
Practical example for a Singapore B2B company: After sending a case study email, branch based on click behaviour. If the contact clicked the link and visited the case study page, send a follow-up offering a free consultation. If the contact opened but did not click, send a different case study with a different angle. If the contact did not open at all, resend with a new subject line after 48 hours.
Multi-Branch Conditions
Some platforms support multiple branches from a single condition point. For example, branch based on industry: financial services contacts receive industry-specific content, healthcare contacts receive theirs, and technology contacts receive theirs. A default branch catches contacts that do not match any specified criteria.
Nested Conditions
Conditions within conditions create highly targeted pathways. For example: First branch on company size (SME versus enterprise). Within the SME branch, further branch on engagement level (high versus low). Within the high-engagement SME branch, further branch on product interest. Each level of nesting increases personalisation but also increases complexity — limit nesting to three levels maximum to maintain workflow manageability.
Goal-Based Conditions
Set a workflow goal — the action you want contacts to take (book a meeting, make a purchase, submit an enquiry). When a contact achieves the goal, they exit the workflow automatically regardless of where they are in the sequence. This prevents the awkward situation of a contact receiving a sales email after they have already purchased.
Condition Logic Operators
Use AND/OR logic to create precise conditions. “Contact is in Singapore AND has visited the pricing page AND has a lead score above 50” creates a highly specific branch. “Contact has downloaded Resource A OR Resource B OR Resource C” creates a broader qualifying condition. Map your logic clearly before building — complex conditions are difficult to troubleshoot when they behave unexpectedly.
Timing, Delays and Send Windows
Poor timing destroys otherwise excellent workflows. Sending three emails in one day overwhelms contacts. Waiting two weeks between touches loses momentum. Getting timing right requires understanding your audience’s behaviour patterns and respecting their communication preferences.
Delay Best Practices
For welcome sequences, send the first email immediately (within minutes of trigger) and subsequent emails every 2–3 days. For nurture workflows targeting Singapore professionals, space emails 4–7 days apart to respect busy schedules while maintaining presence. For urgent workflows (abandoned cart, price-drop alerts), shorter delays of 1–4 hours are appropriate because urgency is inherent.
Send Windows
Configure send windows to ensure emails arrive at appropriate times. For Singapore B2B audiences, the optimal window is Tuesday through Thursday, 9:00 AM to 11:00 AM or 2:00 PM to 4:00 PM SGT. For B2C, evenings (7:00 PM to 9:00 PM) and weekend mornings perform well. If a workflow’s timing falls outside the send window, the email queues until the next available window.
Wait Until Conditions
Instead of fixed delays, wait until a specific event occurs or a maximum time passes. “Wait until the contact opens the previous email, or 3 days pass — whichever comes first” ensures engaged contacts receive timely follow-ups while disengaged contacts are not abandoned indefinitely. This technique dramatically improves workflow responsiveness.
Frequency Capping
Implement global frequency rules that limit the total number of automated messages a contact receives across all workflows. A practical cap for Singapore audiences: maximum three automated emails per week, maximum one SMS per week, and always allow at least 24 hours between messages from different workflows. Frequency capping requires platform-level configuration rather than individual workflow settings.
Ready-to-Use Workflow Templates
These templates are designed for Singapore businesses. Adapt them to your specific context, but the structure and timing provide proven starting points.
Template 1: Welcome Sequence (5 Emails, 14 Days)
Trigger: New subscriber via website form.
Email 1 (Immediate): Welcome and thank you. Deliver the promised lead magnet or confirm subscription. Set expectations for what they will receive. Include your company UEN and Singapore office address for credibility.
Email 2 (Day 3): Your best piece of content — the blog post, video or guide that resonates most with your audience. Position it as “here is the most valuable thing we can share.”
Email 3 (Day 6): Social proof. A case study or testimonial from a Singapore client. Real results with specific numbers.
Condition check: Has the contact clicked any link in Emails 1–3?
If yes — Email 4A (Day 9): Soft call to action. Invite them to book a free consultation, start a trial, or take the next step in your sales process.
If no — Email 4B (Day 9): Re-engagement with a different content format (video if previous emails were text-heavy, or an infographic summarising your key value proposition).
Email 5 (Day 14): Value reminder and preference setting. Let them choose what type of content they want to receive. This improves future engagement and respects their autonomy.
Template 2: Lead Nurture Sequence (6 Emails, 30 Days)
Trigger: Contact downloads a resource or attends a webinar.
Goal: Contact books a consultation or requests a quote. If goal is achieved at any point, contact exits the workflow.
Email 1 (Immediate): Deliver the resource and provide one additional insight related to the topic.
Email 2 (Day 5): Related blog post or article that deepens the topic. Link to your services page naturally within the content.
Email 3 (Day 10): Case study showing how a Singapore business solved the problem the resource addresses.
Condition check: Has contact visited pricing or services page?
If yes — Email 4A (Day 14): Direct offer to discuss their specific needs. Include calendar booking link.
If no — Email 4B (Day 14): Different angle on the original topic. Address a common objection or misconception.
Email 5 (Day 21): Industry insights or data relevant to Singapore market. Position your expertise without hard-selling.
Email 6 (Day 30): Final email with clear CTA. “We would love to help — here is how to get started.” If no engagement throughout the sequence, move contact to a lower-frequency newsletter instead.
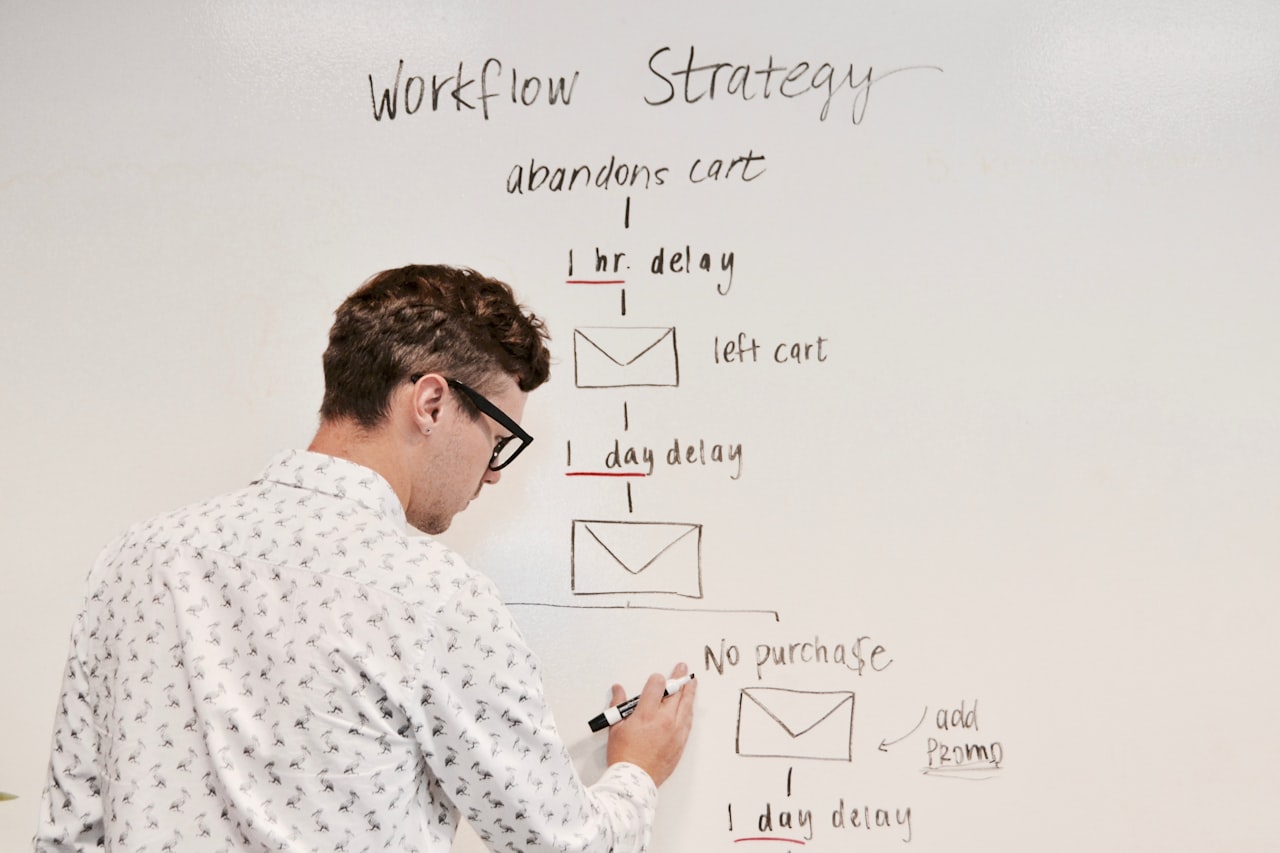
Template 3: Abandoned Cart Recovery (3 Emails, 7 Days)
Trigger: Cart abandoned with items valued over SGD 50.
Email 1 (1 hour after abandonment): Simple reminder — “You left items in your cart.” Show the product images and names. No discount yet.
Email 2 (24 hours): Address common hesitations — shipping information, return policy, customer reviews. If applicable, offer free shipping within Singapore.
Condition check: Has contact returned to the site?
If returned but not purchased — Email 3 (72 hours): Time-limited incentive — 10% off or free gift with purchase. Create genuine urgency.
If no site visit — Email 3 (72 hours): Alternative products in the same category. “You might also like…” approach.
Template 4: Customer Onboarding (4 Emails, 21 Days)
Trigger: First purchase completed or contract signed.
Email 1 (Immediate): Welcome to the family. What to expect next. Key contacts and support channels. For service businesses, include the onboarding timeline and first deliverable date.
Email 2 (Day 3): Getting started guide. Quick wins the customer can achieve immediately. Link to knowledge base or tutorial videos.
Email 3 (Day 10): Check-in. “How are things going?” Include a one-click satisfaction survey. Link to support if they are experiencing issues.
Email 4 (Day 21): First value milestone. Celebrate what they have achieved. Introduce additional features or services they have not yet explored. Plant the seed for upsell or referral.
Template 5: Re-Engagement Workflow (3 Emails, 21 Days)
Trigger: Contact has not opened any email in 60 days.
Email 1 (Day 0): “We miss you” with your best recent content. Fresh subject line style — break the pattern that led to disengagement.
Email 2 (Day 7): Preference update request. “Tell us what you want to hear about.” Give them control over frequency and topics.
Email 3 (Day 14): Final attempt. “Should we stop emailing?” Direct and honest. If no engagement after this email, suppress the contact from future automated campaigns and move to an annual re-permission request. This protects your sender reputation and ensures healthy engagement metrics across all your email marketing efforts.
Advanced Workflow Techniques
Once your foundational workflows perform well, these advanced techniques increase sophistication and results.
Workflow Chaining
Connect workflows so completing one enrols the contact into the next. A welcome sequence completion can trigger enrolment into a topic-specific nurture track based on which links the contact clicked during the welcome series. Chaining creates a continuous, evolving experience without requiring a single monolithic workflow that becomes impossible to manage.
Dynamic Content Blocks
Instead of building separate workflows for different segments, use dynamic content within a single workflow. The email template stays the same, but specific sections — images, offers, case studies, CTAs — change based on contact attributes. A single nurture workflow can serve five industries simultaneously when the case study block dynamically shows the relevant industry example. This reduces workflow proliferation while increasing personalisation.
Predictive Send-Time Optimisation
Some platforms analyse each contact’s historical engagement patterns and send emails at the time each individual is most likely to open. This can increase open rates by 15–25% compared to fixed send times. For Singapore businesses targeting audiences across ASEAN time zones, predictive sending eliminates the challenge of finding one optimal time for contacts in Singapore, Malaysia, Indonesia and Thailand.
Multi-Channel Workflow Integration
Extend workflows beyond email. After two emails without engagement, trigger an SMS. After a high-value page visit, add the contact to a social media retargeting audience. When a lead score crosses the sales threshold, create a task in your CRM. Multi-channel workflows meet contacts where they are most responsive rather than forcing all communication through a single channel.
Lead Scoring Within Workflows
Embed scoring actions within workflows to adjust lead scores based on behaviour during the sequence. Opening Email 1 adds 5 points. Clicking through to the case study adds 10 points. Visiting the pricing page adds 20 points. Not opening any email in the sequence subtracts 10 points. This creates a real-time scoring mechanism that reflects actual engagement rather than just demographic assumptions.
Webhook and API Actions
For businesses with custom systems, webhook actions within workflows can trigger external processes — update a project management tool, create a record in a custom database, send data to a business intelligence platform, or trigger actions in applications not natively integrated with your automation platform. This extends automation beyond marketing into operational processes.
Testing and Debugging Workflows
No workflow should go live without thorough testing. Workflow errors — wrong emails sent, broken conditions, missing delays — damage trust and are difficult to undo.

Pre-Launch Testing Checklist
Before activating any workflow, verify each element:
- Trigger fires correctly and enrolment criteria filter as intended
- Every email renders properly across desktop and mobile (test in Gmail, Outlook and Apple Mail at minimum)
- All personalisation tokens resolve correctly and have fallback values for missing data
- Every link works and leads to the correct destination
- Conditions branch correctly — test both the “yes” and “no” paths
- Delays and send windows function as configured
- Goal and exit conditions remove contacts appropriately
- Internal notifications reach the correct team members
- The workflow does not conflict with other active workflows (check frequency caps)
Testing Methods
Use test contacts (yourself and colleagues) to walk through the entire workflow. Create test contacts that meet different condition criteria to verify all branches. Most platforms offer a “test mode” or the ability to skip delays during testing — use these features but also run at least one real-time test to verify timing works correctly.
Common Debugging Issues
When a workflow behaves unexpectedly, check these common culprits: contacts not meeting enrolment criteria due to missing data, conditions evaluating incorrectly because of data type mismatches (text “50” versus number 50), send windows causing unexpected delays, other workflows interfering through shared suppression rules, and email clients blocking tracking pixels that conditions depend on.
For complex workflows, maintain a documentation page that describes each step’s purpose, expected behaviour and owner. When something breaks at 2:00 AM, this documentation lets anyone on the team diagnose and resolve the issue quickly. Integrating workflows with your SEO strategy ensures the content that triggers enrolment also drives organic traffic — doubling the value of every piece you create.
Ongoing Monitoring
After launch, monitor workflow performance daily for the first week, then weekly. Key monitoring metrics: enrolment rate (are contacts entering as expected?), completion rate (what percentage finish the full sequence?), drop-off points (where do contacts disengage?), and goal achievement rate (what percentage take the desired action?). Set up alerts for anomalies — sudden drops in enrolment or spikes in unsubscribes signal problems requiring immediate attention.
Frequently Asked Questions
How many automation workflows should I start with?
Start with three to five workflows. A welcome sequence, one lead nurture workflow, and one post-purchase or retention workflow cover the highest-impact points in most customer journeys. Building fewer workflows well is always better than building many workflows poorly. Expand after your initial workflows achieve consistent performance against their KPIs for at least four to six weeks.
What is the ideal length for an automation workflow?
It depends on the workflow’s purpose and your sales cycle length. Welcome sequences work best at four to six emails over two weeks. Lead nurture workflows for Singapore B2B businesses with 30–60 day sales cycles typically run five to eight emails over four to six weeks. Abandoned cart workflows should be short — three emails over three to seven days. The rule of thumb is: as long as needed to achieve the goal, no longer.
How do I prevent contacts from receiving too many automated emails?
Implement three safeguards: frequency caps at the platform level (maximum three automated emails per week per contact), priority rules that suppress lower-priority workflows when higher-priority ones are active, and mutual exclusion rules that prevent a contact from being enrolled in conflicting workflows simultaneously. Most mid-range and enterprise platforms support these controls natively.
Should I use plain text or HTML emails in automation workflows?
Test both with your audience. For Singapore B2B communications, plain text emails often outperform HTML because they feel personal and avoid spam filters more reliably. For B2C and e-commerce, branded HTML emails with product images typically perform better. A practical approach: use plain text for one-to-one-style communications (follow-ups, consultations) and HTML for content delivery and promotions.
How do I write effective automation email subject lines?
Automation email subject lines should feel contextual, not promotional. Reference the trigger action: “Your guide to [topic] is ready” (post-download), “Continuing our conversation about [topic]” (nurture follow-up), or “Quick question about your [product] experience” (post-purchase). Avoid clickbait — automation builds long-term relationships, and trust is the foundation. Keep subject lines under 50 characters for optimal mobile display.
Can I use automation workflows for SMS marketing in Singapore?
Yes, but with strict compliance requirements. Under PDPA and the Do Not Call Registry provisions, you need explicit consent for SMS marketing. Check numbers against the DNC Registry before sending. SMS works best for time-sensitive messages within existing workflows — appointment reminders, delivery notifications, flash sale alerts — rather than as standalone campaigns. Limit automated SMS to one to two per week maximum.
What happens when a contact is in multiple workflows simultaneously?
Without controls, contacts receive messages from all active workflows, leading to excessive volume and potentially conflicting messages. Manage this by establishing workflow priority levels, implementing mutual exclusion rules (if enrolled in Workflow A, suppress from Workflow B), and configuring global frequency caps. Some platforms offer a “communication limit” feature that automatically holds lower-priority messages when caps are reached.
How do I measure which workflow is performing best?
Compare workflows using goal achievement rate (the percentage of enrolled contacts who complete the desired action), revenue per contact enrolled, and cost per conversion. Avoid comparing open rates across workflows with different purposes — a re-engagement workflow will naturally have lower opens than a welcome sequence. The meaningful comparison is whether each workflow achieves its specific objective at an acceptable cost.
When should I retire or replace a workflow?
Retire a workflow when: its goal achievement rate declines steadily for three or more months despite optimisation attempts, the business context it was designed for has changed significantly, or its content references outdated products, pricing or messaging. Before retiring, analyse what worked within the workflow — successful elements can be reused in its replacement. Review all active workflows quarterly to assess continued relevance.
How do automation workflows integrate with paid advertising?
Workflows can push contacts to custom audiences for Google Ads and social media retargeting based on lifecycle stage or behaviour. For example, contacts who complete a nurture workflow without converting can be added to a retargeting audience for display ads. Contacts who reach MQL status can be excluded from awareness campaigns to avoid wasted ad spend. This coordination between automation and paid channels significantly improves overall marketing efficiency.