Later Tutorial: Schedule Instagram and Social Media Posts
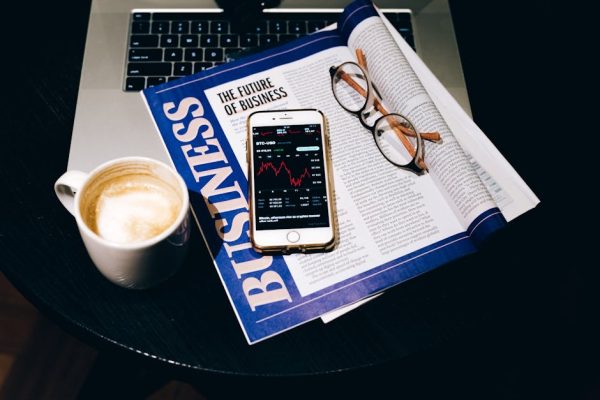
Later began as an Instagram-first scheduling tool and has since expanded into a full social media management platform. Its visual-first approach to content planning makes it uniquely suited for brands that rely heavily on aesthetics — think fashion retailers, F&B businesses, travel companies, and lifestyle brands. If your marketing success depends on how your feed looks, Later deserves serious consideration.
Singapore’s social media landscape is intensely visual. From Instagram-worthy hawker dishes to sleek condo launch campaigns, Singaporean audiences expect polished, cohesive content. This Later tutorial will help you leverage Later’s visual planner, scheduling tools, and analytics to elevate your social media marketing in 2026.
This guide covers connecting your social accounts, using the visual content planner, finding the best times to post, setting up Linkin.bio, using hashtag suggestions, interpreting analytics, and configuring auto-publishing for a hands-free workflow.
Connecting Your Social Media Accounts
Later supports Instagram, TikTok, Facebook, Pinterest, LinkedIn, and X (Twitter). Here is how to get your accounts connected and ready for scheduling:
Step 1: Create your Later account. Visit later.com and sign up with your email or Google account. Later offers a free plan with limited features, which is a good starting point for testing the platform.
Step 2: Connect Instagram. Click “Add Social Profile” and select Instagram. Later will prompt you to log in to your Instagram account and authorise access. For auto-publishing to work, your Instagram account must be a Business or Creator profile linked to a Facebook Page. Personal accounts only support notification-based reminders.
Step 3: Connect additional platforms. Repeat the process for each platform you want to manage. For each connection, you will need to log in and grant Later the necessary permissions. Later’s dashboard organises your connected accounts in the top navigation bar, making it easy to switch between them.
Step 4: Set your time zone. Navigate to Settings and confirm your time zone is set to SGT (UTC+8). This is essential for ensuring your scheduled posts go live at the correct local time for your Singapore audience.
Singapore marketers should prioritise connecting Instagram and TikTok first, as Later’s visual planning tools are most powerful on these platforms. If you also maintain a Pinterest presence — useful for businesses in fashion, home decor, or food — Later’s Pinterest scheduling is among the best available. For a well-rounded digital marketing approach, connect all platforms where you actively engage with your audience.
Using the Visual Content Planner
Later’s visual planner is its standout feature and the primary reason many brands choose it over competitors. It allows you to see exactly how your Instagram grid will look before publishing anything.
How the visual planner works:
Step 1: Upload your media. Click the “Media” section and upload images and videos from your computer, phone (via the Later mobile app), Dropbox, or Google Drive. Later stores your media in a centralised library, organised by upload date, labels, or starred status.
Step 2: Open the calendar view. Navigate to the Calendar tab. You will see a weekly or monthly view with time slots for each connected social profile. Each slot shows a thumbnail preview of any scheduled content.
Step 3: Drag and drop. Select media from your library and drag it onto your desired time slot. The visual planner instantly updates to show how this post fits within your existing content calendar. For Instagram specifically, a grid preview on the right side of the screen shows exactly how your feed will look to visitors.
Step 4: Rearrange as needed. Drag posts between time slots to reorder them. The grid preview updates in real time, allowing you to experiment with different sequences until the visual flow feels right.
For visually driven Singapore brands — a boutique clothing label, a cafe with Instagrammable interiors, or a beauty brand — this grid planning capability is transformative. Instead of posting reactively and ending up with an inconsistent feed, you can curate a cohesive aesthetic that reinforces your brand identity.
Practical tip: Use Later’s “Labels” feature to colour-code your content by type (product photos, user-generated content, testimonials, behind-the-scenes). This makes it easy to ensure a healthy content mix in your calendar and avoid posting too much of one content type in a row.
Finding the Best Time to Post
Posting at the right time can significantly impact engagement. Later provides data-driven recommendations to help you optimise your publishing schedule.
Accessing Best Time to Post: Navigate to Analytics, then select “Best Time to Post.” Later analyses your historical engagement data and highlights the time slots when your audience is most active and likely to engage with your content.
How it works: Later examines your past posts’ engagement rates — likes, comments, saves, and shares — correlated with the time they were published. It then generates a heatmap-style visualisation showing the strongest posting windows for each day of the week.
General guidelines for Singapore audiences:
- Weekday mornings (7:00–9:00 AM): Catch commuters scrolling through feeds on public transport.
- Lunch hours (12:00–1:30 PM): High engagement as people browse social media during their break.
- Weekday evenings (7:30–10:00 PM): Peak leisure browsing time after dinner.
- Weekend mornings (9:00–11:00 AM): Relaxed browsing window, particularly for lifestyle and leisure content.
These are starting points. Your specific audience may behave differently depending on demographics, industry, and content type. Rely on Later’s Best Time to Post data for your account rather than generic guidelines, especially once you have at least four to six weeks of posting history to generate reliable patterns.
Applying insights: Once you identify your best times, update your posting schedule in Later’s settings so that the “Auto” scheduling option places content into those high-engagement windows. This pairs well with a broader content marketing strategy that aligns posting times with campaign objectives and audience behaviour.
Setting Up Linkin.bio
Linkin.bio is Later’s answer to the single-link limitation on Instagram and TikTok. It creates a clickable, shoppable landing page that mirrors your Instagram feed, turning each post into a link opportunity.
Step 1: Enable Linkin.bio. Navigate to the Linkin.bio section in Later and click “Set up Linkin.bio.” Choose your URL slug (e.g., linkin.bio/yourbrand).
Step 2: Customise your page. Add your profile photo, brand name, and bio text. Choose a theme and colour scheme that matches your brand. Later offers several layout options including a grid view (mirroring your Instagram feed) and a featured links section at the top.
Step 3: Add links to posts. When scheduling an Instagram post in Later, you will see a “Linkin.bio” option. Click it and enter the URL you want to associate with that post — a product page, blog article, booking link, or any other destination. When users visit your Linkin.bio page, clicking on that post’s image takes them directly to the linked URL.
Step 4: Add button links. Beyond post-specific links, you can add persistent button links at the top of your Linkin.bio page. Common buttons for Singapore businesses include “Shop now,” “Book a table,” “WhatsApp us,” “View menu,” and “Visit our website.”
Step 5: Update your Instagram bio. Replace your current bio link with your Linkin.bio URL. Now every post you share can drive traffic to a specific page, dramatically increasing the commercial value of your Instagram presence.
For Singapore e-commerce businesses, Linkin.bio is particularly powerful. A fashion brand can link each outfit post directly to the product page, creating a seamless path from discovery to purchase. Restaurants can link food photos to their reservation system. Service businesses can link testimonial posts to their website’s contact page.
Hashtag Suggestions and Management
Hashtags remain an important discovery mechanism on Instagram, and Later provides tools to help you find and organise effective hashtags.
Hashtag Suggestions: When composing a post in Later, click the hashtag icon to access suggestions. Enter a seed hashtag related to your content — for example, #SingaporeEats — and Later generates a list of related hashtags, grouped by popularity (high, medium, low competition). A balanced mix across all three categories typically performs best.
Saved hashtag groups: Create and save groups of hashtags for reuse. For instance, a Singapore fitness studio might maintain groups like:
- General fitness: #SingaporeFitness #SGFit #WorkoutSingapore #FitnessMotivation #GymSG
- Yoga-specific: #YogaSingapore #SGYoga #YogaLife #MindBodySoul #YogaEveryday
- Location-based: #TanjongPagar #CBDSingapore #OrchadRoad #TiongBahru
Instead of typing hashtags manually for every post, simply select the appropriate saved group and insert it. You can add hashtags directly to the caption or as a first comment, depending on your preference.
Hashtag analytics: On Later’s Growth and Advanced plans, you can track which hashtags drive the most reach and engagement for your posts. This data helps you refine your hashtag strategy over time, dropping underperforming tags and doubling down on those that consistently extend your reach.
For businesses running SEO campaigns alongside social media, think of hashtags as social search optimisation. Just as you target specific keywords for Google, target specific hashtags to increase discoverability on Instagram and TikTok.
Understanding Later Analytics
Later’s analytics tools help you measure performance, identify trends, and make data-driven decisions about your social media strategy.
Accessing analytics: Click the Analytics tab in the main navigation. Select the social profile you want to analyse. Later presents data across several sections:
Profile analytics: Overview metrics including follower count, follower growth rate, total posts published, and overall engagement rate for a selected date range. Compare periods to identify growth trends or seasonal patterns.
Post analytics: Detailed performance data for each individual post, including likes, comments, saves, shares, reach, and impressions. Sort posts by any metric to quickly identify your top performers and understand what type of content resonates most with your audience.
Stories analytics: For Instagram Stories, Later tracks impressions, reach, taps forward, taps back, exits, and replies. High exit rates on specific story frames suggest the content is not holding attention, while high reply rates indicate strong engagement.
Audience demographics: Understand your followers’ age ranges, gender split, and top locations. For Singapore-focused businesses, confirm that the majority of your followers are indeed based in Singapore. If you discover a significant following from overseas, consider whether you should create content tailored to that audience as well.
Applying analytics insights: Review your analytics at least fortnightly. Identify patterns in your top-performing content — is it a certain visual style, topic, format, or posting time? Use these insights to inform your content planning and gradually increase the proportion of content types that generate the strongest results.
Configuring Auto-Publishing
Auto-publishing allows Later to post content automatically at your scheduled times without any manual intervention. Here is how to set it up and ensure it works reliably:
Requirements for auto-publishing:
- Instagram: Business or Creator account linked to a Facebook Page.
- Facebook: A connected Facebook Page (not a personal profile).
- Pinterest: A connected Pinterest Business account.
- TikTok: A connected TikTok Business account.
- LinkedIn: A connected LinkedIn Page or profile.
Enabling auto-publish:
Step 1: When creating a post, ensure the “Auto Publish” toggle is switched on. If your account meets the requirements above, this option will be available.
Step 2: Complete your post details — caption, media, hashtags, and Linkin.bio link. Set your desired date and time.
Step 3: Click “Schedule.” Later will publish the post automatically at the scheduled time. You will receive a confirmation notification once the post goes live.
Content types that support auto-publishing on Instagram:
- Single image posts
- Carousel posts (multiple images)
- Reels
Stories currently require notification-based publishing on most scheduling platforms, including Later. When the scheduled time arrives, Later sends a push notification to your phone with the media and caption ready to paste. You then open Instagram and publish manually.
For Singapore businesses managing multiple platforms, auto-publishing eliminates the daily task of manually posting to each channel. Combine this with Later’s Best Time to Post feature and you create a largely automated workflow that delivers content at optimal times. This frees your team to focus on higher-value activities like community engagement, creative development, and campaign strategy linked to your paid advertising efforts.
Troubleshooting: If auto-publishing fails, check that your account authorisations are still active. Instagram and Facebook periodically require re-authentication, which can interrupt the connection. Navigate to Later’s Settings and reconnect any flagged accounts promptly.
Soalan Lazim
Is Later free to use?
Later offers a free plan that includes one social set (one profile per platform), limited scheduled posts per month, and basic analytics. It is suitable for individuals or very small businesses testing the platform. Paid plans unlock significantly more features including unlimited scheduling, advanced analytics, and Linkin.bio customisation.
Can Later schedule TikTok videos?
Yes, Later supports TikTok scheduling with auto-publishing for TikTok Business accounts. You can upload your video, write a caption, add hashtags, and schedule it to publish at your preferred time. This is particularly useful for Singapore brands targeting younger audiences on TikTok.
How does Linkin.bio differ from Linktree?
The key difference is that Linkin.bio mirrors your Instagram grid, making each post clickable and linkable. Linktree provides a list of static buttons. For brands that want to drive traffic from specific posts to specific pages, Linkin.bio offers a more visual and contextual experience. Both are effective, but Linkin.bio integrates directly with your Later scheduling workflow.
Can I plan Instagram Reels with Later?
Yes, Later supports scheduling and auto-publishing for Instagram Reels. Upload your video in the composer, add a caption, cover image, and hashtags, and schedule it like any other post. Later’s visual planner also shows Reels within your grid preview, so you can see how the cover image fits within your overall feed aesthetic.
Does Later support Instagram carousel posts?
Yes, Later fully supports Instagram carousel posts with up to 20 images or videos per carousel. Upload your media in the correct order, preview the carousel within the composer, and schedule it for auto-publishing. Carousels are among the highest-engaging content formats on Instagram, making this an essential feature.
How accurate is Later’s Best Time to Post feature?
The accuracy improves with more data. Later needs at least a few weeks of posting history on your account to generate reliable recommendations. The suggestions are based on your specific audience’s behaviour, not generic industry averages, which makes them more relevant than one-size-fits-all guidelines. Revisit the recommendations quarterly as audience habits can shift with seasonal changes.